Healing Tobacco Balm: Nature’s Soothing Infusion
Have you ever thought of mixing healing balm with tobacco leaves? This soothing homemade balm not only helps with skin health but has a calming aroma too! Let’s explore how to create it together.

- A Soothing Journey into Herbal Healing
- A Brief Look at Healing Tobacco Balm
- The Wonderful Benefits of Tobacco Balm
- Ready to Craft Some Magic?
- Essential Ingredients Guide
- Get Ready to Whip Up Some Professional Quality in Your Kitchen!
- Pro Tips & Secrets
- Perfect Presentation
- Storage & Make-Ahead
- Creative Variations
- Complete Nutrition Guide
- Expert FAQ Solutions
- In Conclusion
- Recipe Card
A Soothing Journey into Herbal Healing
Ever had one of those days where your skin just feels… off? i mean, we're talking about that itch, the dryness, or just general irritation that won’t quit.
Trust me, i've been there. a couple of years ago, i scratched my arm so much that i swore i'd leave marks stronger than any love tattoo.
That night, i stumbled onto something remarkable: i learned how to mix healing balm with tobacco leaves , and it changed my entire skincare game.
Let me tell you, it's not just about slapping on a cream to fix what’s wrong. this balm—a natural skin remedy —combines good old-fashioned herbal practices with modern comfort.
Think of it as a little magic potion for your skin that helps soothe those annoying flare-ups while also giving you a whiff of nature.
A Brief Look at Healing Tobacco Balm
Did you know that tobacco leaves have been used in traditional medicine across various cultures for hundreds of years? it's pretty cool! the tobacco leaf infusion in this balm isn’t just for show.
It’s been recognized for its anti-inflammatory properties, often seen as a natural ally in fighting skin irritations.
In today’s world, as we’re all looking to swap out harsh chemicals for something a little more eco-friendly, this healing balm has found its place.
It's far from mainstream, but trust me—once you find it, you'll want to make it a part of your routine.
Now, if you're worried about how much time you’ll need to invest, fear not! this diy project takes about 20 minutes of active prep time and just an hour for the infusion—so, less than two hours in total, which is honestly not bad at all for something that’ll make your skin sing.
Plus, it yields about four ounces, so you’ll have plenty to share—or keep all for yourself!
The Wonderful Benefits of Tobacco Balm
So, let’s chat about why you should whip up this homemade healing salve . first of all, the coconut oil benefits are like the cherry on top.
It hydrates and nourishes your skin deeply, thanks to its smooth application. you’re not just slathering on another moisturizer; you’re indulging in a balm that genuinely heals and restores.
This balm really shines during special occasions. got a spa night lined up with friends? this is an excellent gift idea for homemade products .
It doubles as a soothing agent—just what you need after a long week. and if you’re into meditative practices, you’ll love incorporating this into your routine as part of your calming balms for relaxation .
Compared to other skin treatments, this one stands out because of its natural ingredients . many off-the-shelf options are packed with unpronounceable additives.
With this balm, you know exactly what’s going into it! plus, it's a fantastic way to explore dried tobacco leaves uses while getting crafty—hello, diy herbal balms !
Lastly, let’s not forget the essential oils for balms . Whether you decide to add lavender or eucalyptus, they’ll amp up the soothing vibe, making it a personalized treat just for you.
Ready to Craft Some Magic?
Now that you’re all jazzed about the fabulous benefits of this natural moisturizing balm , it’s time to grab your ingredients and start mixing! remember, the key to a great balm is in the infusion methods for oils, so take your time.
It’s all about enjoying the process and creating something special for yourself.
So, get ready for the next section, where we’ll dive deep into the ingredients and the step-by-step process! you'll be crafting your own little jar of magic in no time.
Let's dive in!
Essential Ingredients Guide
Cooking is like a love language, isn't it? the right ingredients can totally change the vibe of what you’re making.
It’s crucial to know what you need in your pantry—so let’s break down the essentials, shall we?
Premium Core Components
First up, measuring . a good recipe starts with accurate measurements. for all you bakers out there, let’s get precise—1 cup is about 240 ml .
If you're in the metric world, keep a scale handy. it’ll make life so much easier, trust me!
Next, how do you know you're getting the best ingredients? look for quality indicators. fresh herbs should look vibrant, not wilted.
Coconut oil should smell like a tropical getaway. check the expiration date on those packets before you spend your cash!
How long do ingredients last? well, dried herbs can hang out in your pantry for about 1-3 years , but once they're open? best to toss after 6 months if they lose their smell.
Store oils in a cool, dark place. keep it tight, and you’ll be making herbal remedies for ages.
Signature Seasoning Blend
Now, let’s spice things up! all these delicious recipes i’ve tackled over the years always seem to pop with a signature blend .
Think garlic powder, onion powder, and paprika for a smokin’ combo. but don’t forget about fresh herbs! basil and oregano make a stellar pair, especially when they’re infused into a dish.
For flavor enhancers, consider things like soy sauce or a splash of lemon juice . you can’t go wrong there, babe.
And some regions have their unique flair—cajun spices give your food a good kick. experiment away!
Smart Substitutions
We all have those moments of realization when we’re missing an ingredient mid-recipe. No worries!
If your recipe calls for sour cream and it’s nowhere to be found, go for greek yogurt as a quick swap.
Or those dried tobacco leaves? use dried sage or chamomile for similar soothing properties. it’s all about knowing your options, right?
And for special diets, think about coconut oil—it’s not just a cooking oil; it’s a great base for herbal healing balms too.
For our vegan friends out there, ditch the beeswax and substitute it with carnauba wax or candelilla wax. easy-peasy!
Kitchen Equipment Essentials
Every kitchen has its must-haves. you need a good knife—oh my gosh, a sharp knife can totally change your game! and a sturdy cutting board? that’ll save your countertops and keep your fingers safe.
Nobody wants an accidental chop!
If you don't want to splurge, you can find alternative tools in thrift stores or check out diy options. a microwave-safe bowl can double as a double boiler if you’re in a pinch.
Storage is key too. Keep everything labeled and organized in clear containers. You won’t believe how much easier cooking becomes when you can see all your goodies.
And while we're at it, let’s not forget about that most unique recipe i discovered, where you can mix healing balm with tobacco leaves for an amazing skin treatment.
Remember, the more you experiment, the more fun cooking becomes!
Wrapping it Up
Whoa, we just scratched the surface of what’s possible in your kitchen! this includes everything from soothing balms to seasoning blends .
Get ready! next up, i’ll take you step-by-step through a delightful recipe: making your own healing tobacco balm . trust me, this infusion is a game-changer.
You won’t want to miss it!
Get Ready to Whip Up Some Professional Quality in Your Kitchen!
So, you've decided to dive into the world of professional cooking? that’s awesome! it's not just about whipping up dinner anymore; it's an art and a science.
Honestly, the thrill of cooking like a pro can transform not just your food but your entire kitchen vibe. let’s chat about some essential skills you’ll need to master.
Essential Preparation Steps
Mise en Place—The Secret Sauce
First things first, mise en place is your best friend. it’s french for “everything in its place.” before you turn on the stove, measure out every ingredient and have them ready to go.
Imagine running through the kitchen, flinging open cabinets to find that pinch of salt while your pot boils over. not cute.
Organize your ingredients in bowls or containers. it'll save you time and keep stress levels down.
Time Management Tips
Timing is the magic ingredient in professional cooking. keep a timer handy. for example, when you need to simmer a sauce, set it for 10 minutes and check it! this isn’t just for amateurs – you’d be surprised how many pros still burn a batch because they lost track of time.
Organization Strategies
Get into a rhythm! place your utensils and pots where they’re easy to grab. trust me, you'll thank yourself later when you're in the zone and can grab a chef’s knife without searching for it for ages .
Safety Considerations
Y’all, safety is no joke in the kitchen. always keep a fire extinguisher within reach. plus, mind your fingers! always balance your knife skills with your attention.
Trust me, one slip can ruin your day.
Step-by-Step Process
1. Clear, Numbered Instructions
Now that you're organized, let’s talk about getting things done:
- Start with prepping your ingredients. Chop, dice, and season ahead.
- Control your temperatures! When frying, aim for 350° F . If you go too high, you’ll burn the food, and if it’s too low, it's just sad.
2. Timing Precision
Knowing when to flip or stir can make or break a dish! don’t just wing it; keep an eye on the clock.
For that roast chicken, 165° f is your magic number for perfectly cooked meat.
3. Visual Cues for Doneness
Learn to read your food. a nice golden-brown color, bubbling sauce, or a gentle sizzle often mean you're on the right track.
But remember, those cues vary by dish, so get familiar with what’s normal for each recipe.
Expert Techniques
Professional Methods
Ever heard of the french smothering technique ? it’s a game changer! use this method to slowly cook down in some liquid or butter.
You get these amazing layers of flavor—not just a one-note wonder.
Critical Steps Explained
Always season as you go. Salt enhances flavors, and trust me, you don’t want bland food. Add a little at every stage to give your meal depth.
Quality Checkpoints
Sampling isn’t just okay—it's encouraged! Taste your food multiple times throughout the cooking process to ensure everything is on point.
Troubleshooting Tips
Stuck with a bland sauce? consider adding vinegar or lemon to brighten flavors. and if a dish turns out too salty, toss in a potato while it cooks to absorb some saltiness.
It’s a classic pro trick!
Success Strategies
Common Mistakes to Avoid
Don’t crowd the pan! It’ll steam your food instead of giving it that beautiful crisp.
Quality Assurance Tips
If you’re cooking for guests, plate it nicely. A well-presented dish shows you care.
Perfect Results Guide
Always use a thermometer! For meats, a quick check of 165° F for poultry or 145° F for pork makes a huge difference.
Make-Ahead Options
Don’t be afraid to prep in advance! Soups, sauces, and marinades are perfect for make-ahead. Enhance flavors by letting them sit overnight before you're ready to serve!
With this guidance, you’ll be on your way to cooking like a pro! oh, and if you happen to be curious about herbal remedies, why not mix healing balm with tobacco leaves ? it’s a unique fusion you can try that offers soothing properties.
Additional Information…
This article scratched the surface, but the kitchen is vast and exciting! keep experimenting, tasting, and learning. with every dish, you'll refine your skills and maybe even uncover your signature sauce along the way.
Look into into the experience, and don’t forget to have fun! happy cooking!
Pro Tips & Secrets
Oh my gosh, making your healing tobacco balm is such a fun adventure. let me share some of my pro tips and secrets that i learned along the way.
First off, prep like a pro . set up your workspace and gather everything before you start. it makes the process smoother! now, when you're whipping up that tobacco leaf infusion , low and slow is the way to go—trust me, patience will bring out those amazing flavors.
If you're in a hurry (who isn't sometimes?), try using a smaller batch of dried tobacco leaves. this speeds up the infusion process.
You can always scale up later once you get the hang of it! and don’t forget to experiment; adding a few drops of essential oils like lavender can elevate your balm.
Oh, and let’s talk presentation —no one wants to gift someone a jumbled-up jar of balm, right? take a minute to label your jars with cute tags.
It makes it look more professional and gift-worthy !
Perfect Presentation
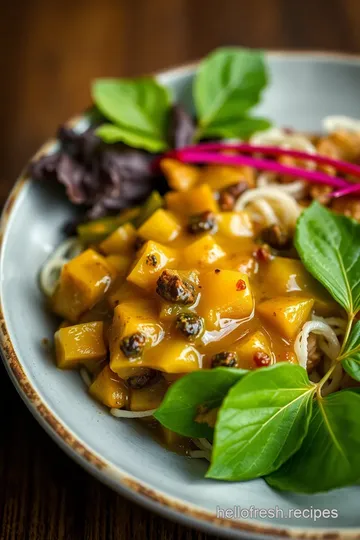
This is the fun part! After you’ve made some kick-on flavors, it’s time to make your finished balm look drool-worthy. Plating isn't just for food, my friends; it works for balms too!
When filling your jars, use a funnel to avoid spills. For a pop of color , toss a few dried flowers or herbs on top, like chamomile or even a sprinkle of dried lavender—hello, aesthetics! Your jars will be Instagram-ready in no time!
And don’t be shy about pairing colors; the combination of earthy browns from the tobacco leaves and the bright greens from herbs looks fantastic.
You want your balm to look inviting and feel calming at the same time—mission accomplished!
Storage & Make-Ahead
Now, let’s chat about storage . this isn’t your average homemade balm; you can keep your healing tobacco balm for several months if stored properly.
Just keep it in a cool, dry place away from direct sunlight.
For freshness, always use a clean spatula or your fingers to scoop out the balm—no double-dipping! best practice is to use the balm within 6 months for optimal potency.
If you've got leftovers, pack them in an airtight container and store them in the fridge. you can reheat your balm in the same way you made it—gentle heat is key!
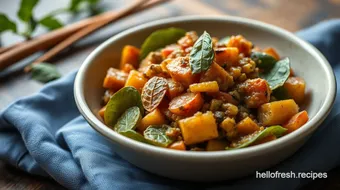
Creative Variations
Feeling adventurous? switching things up with flavor adaptations can lead you down a delightful path of discovery! try adding some dried herbs like chamomile or calendula to enhance the relaxing properties of your balm, or intensify the scent by using different essential oils for balms .
Imagine a minty twist with peppermint oil or a refreshing scent from eucalyptus!
And hey, don't let the seasons pass you by! Use seasonal herbs or flavors that are fresh. Come summer, why not infuse with some dried lavender or a touch of citrus zest? The world is your oyster!
Complete Nutrition Guide
Now, we gotta dive into the nitty-gritty of what’s in your healing balm. while you might not think of salves in terms of nutrition, they do pack a punch.
The coconut oil benefits are endless! it’s not just moisturizing; it has anti-inflammatory properties, which can ease skin irritation.
Tobacco leaves, in moderation, have been used traditionally for their healing properties. you’re looking at a balm that can help soothe the skin and provide a boost of hydration.
Remember to be aware of any allergies— dietary considerations matter even when it comes to skin!
Expert FAQ Solutions
You might have some burning questions—don’t worry, i’ve got answers! one common concern is whether the tobacco leaf infusion is safe to use.
Yes, but it’s essential to use dried leaves, not the raw stuff. always do a patch test before full application, just to be on the safe side!
And if your balm turns out too hard, just melt it down again and add a little more coconut oil.
If it’s too soft, melt it and toss in a bit more beeswax. that’s the beauty of crafting your own salve—you’re in control!
In Conclusion
So there you have it! your very own healing tobacco balm journey awaits. whether you’re whipping it up for yourself or gifting it to a friend, this diy adventure incorporates sustainability and creativity in simply beautiful ways.
Remember, tobacco leaves have been used for ages in traditional herbal practices —so you’re not just making a balm; you’re embracing history.
Look into in and enjoy the wonderful art of making your own healing salve , because who doesn't want to whip up some all-natural skincare magic? happy crafting!
Healing Tobacco Balm: Nature’s Soothing Infusion Card
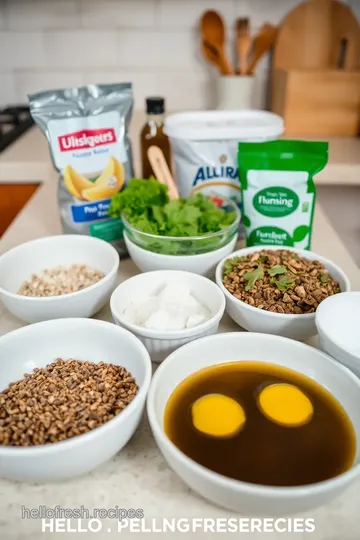
⚖️ Ingredients:
- 1 cup coconut oil (240 ml)
- 2 tablespoons dried tobacco leaves (30 g)
- 1 ounce beeswax (28 g)
- 10 drops essential oil (optional; e.g., lavender or eucalyptus)
- Small glass jars for storage
🥄 Instructions:
- Step 1: In a double boiler, melt the coconut oil over low heat.
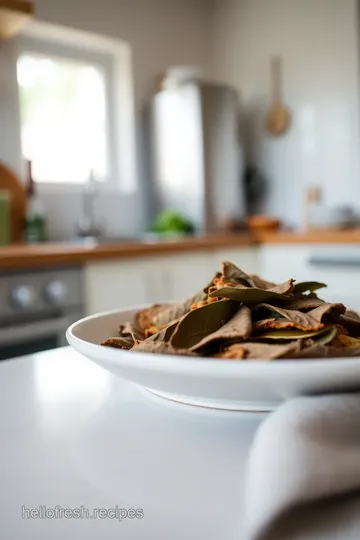
- Step 2: Once melted, add the dried tobacco leaves.
- Step 3: Stir gently and maintain low heat for 1 hour to allow the infusion.
- Step 4: After the infusion period, remove from heat.
- Step 5: Strain the oil using a fine mesh strainer or cheesecloth into a separate container, discarding the tobacco leaves.
- Step 6: Return the infused oil to the double boiler.
- Step 7: Add the beeswax and heat, stirring until completely melted and combined.
- Step 8: Optionally, add essential oils and mix well.
- Step 9: Pour the balm into small glass jars.
- Step 10: Allow to cool at room temperature until set.
Previous Recipe: Easy Quick Spaghetti with a Kick of Spice: 5 Bold Ways to Delight!
Next Recipe: How to Make a Whimsical Crock Pot Quinoa Hello Kitty Meal in 6 Hours